Parents and parent items
Creating an app with QSkinny consists of creating controls, putting them into layouts and nesting layouts and controls inside each other. The nesting already creates some sort of a hierarchy in the app, see the "Nesting layouts" section in the layouts page. In more general terms, all controls are part of several hierarchies:
-
The object tree. This is a tree of
QObjectinstances which manages lifetime: Objects created with a parent will get deleted whenever their parent is deleted. For more information, see the Qt documentation on Object Trees & Ownership. -
The item tree. This is a tree of items displayed on the screen, i.e.
QQuickIteminstances. Qt will traverse the item tree when rendering items on the screen. The positioning of an item depends on its parent item, e.g. layouts will position their child items according to certain policies. In addition, visual items will inherit properties from its parent item like visibility or opacity. The item tree is often similar to the object tree, but not necessarily: Instances ofQQuickItemcan have a parent item set, but have another parent, or no parent at all. See also the Qt documentation on Concepts - Visual Parent in Qt Quick. -
The scene graph. The scene graph contains a representation of graphic primitives like rectangles, textures (i.e. images) and text, to allow efficient rendering on the screen with OpenGL or other backends. This is described in more details in scene graph representations of controls.
Example
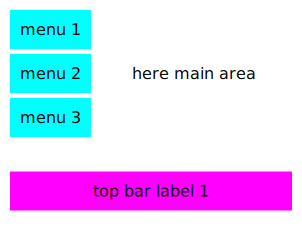
Let’s look at the "Nesting layouts" example from the layouts documentation. The UI looks like this:
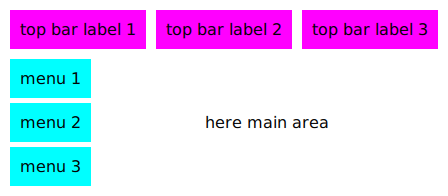
The code for this UI is below:
auto* outerBox = new QskLinearBox( Qt::Vertical );

auto* topBar = new QskLinearBox( Qt::Horizontal, outerBox );

auto* topLabel1 = new QskTextLabel( "top bar label 1", topBar );
auto* topLabel2 = new QskTextLabel( "top bar label 2", topBar );
auto* topLabel3 = new QskTextLabel( "top bar label 3", topBar );

auto* mainBox = new QskLinearBox( Qt::Horizontal, outerBox );

auto* menuBox = new QskLinearBox( Qt::Vertical, mainBox );

auto* menuLabel1 = new QskTextLabel( "menu 1", menuBox );
auto* menuLabel2 = new QskTextLabel( "menu 2", menuBox );
auto* menuLabel3 = new QskTextLabel( "menu 3", menuBox );

auto* mainText = new QskTextLabel( "here main area", mainBox );

QskWindow window;
window.addItem( outerBox );
window.show();
Object tree
In the example above, when we created a new element, we always passed
the QObject parent as an argument to the constructor, which is good
practice. We do that for instance in this line:
auto* topLabel1 = new QskTextLabel( "top bar label 1", topBar );This makes sure topBar is a parent of topLabel1. It means that when
topBar is deleted, it will automatically delete topLabel1, because
the latter is a child of the topBar.
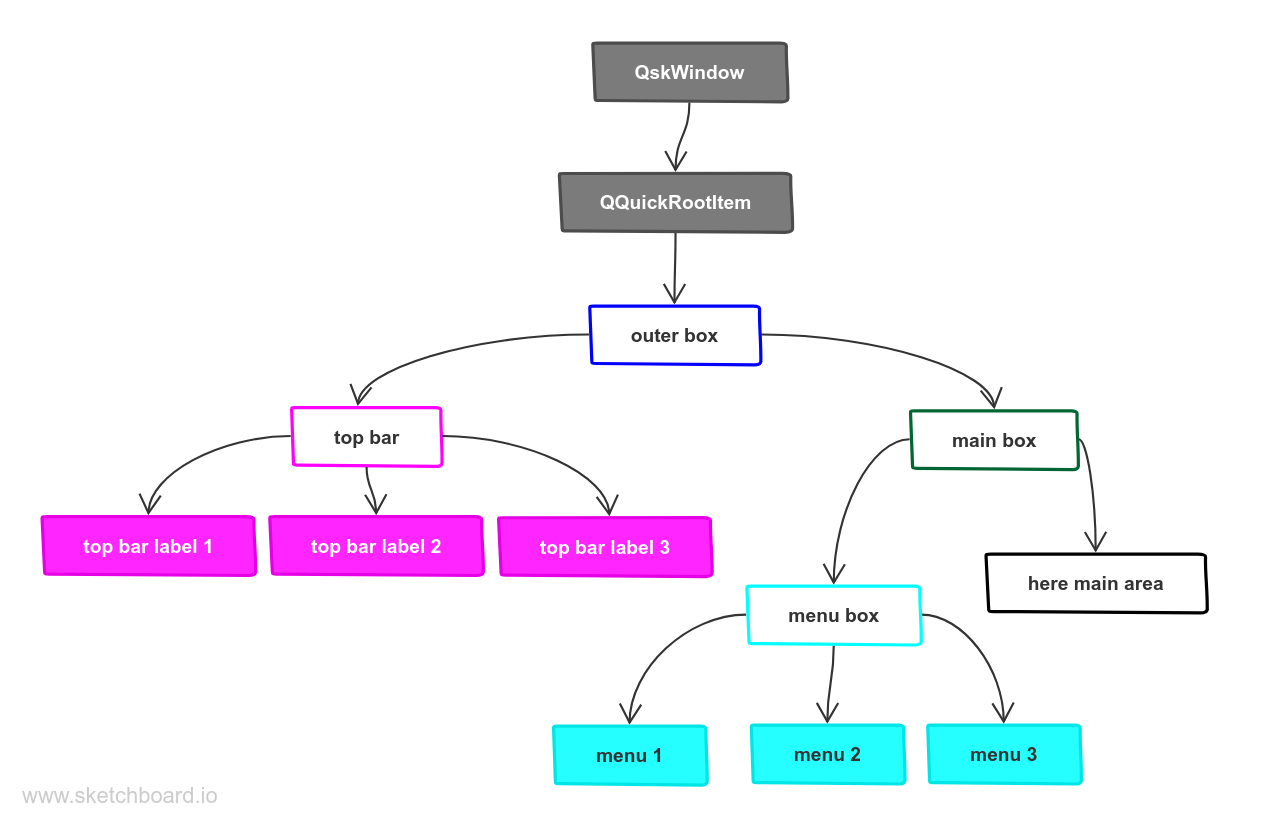
Below is an image of the object tree, i.e. the QObject parent-child
relationship. The QskWindow is hereby the parent of the
QQuickRootItem, which itself is the parent of the outer box, and so
on. For information on how to obtain this tree, see
QObject::dumpObjectTree().
Item tree
The Item tree for the example above is identical to the object tree. As described, we always pass the parent object in the constructor:
auto* topLabel1 = new QskTextLabel( "top bar label 1", topBar );The line above will (in addition to the setting the parent) also ensure
that topBar will be a parent item of topLabel1; this is done by
the QQuickItem constructor.
Even if we had not passed the parent in the constructor, we could still
add the label to the topBar via an explicit call:
auto* topLabel1 = new QskTextLabel( "top bar label 1" );
topBar->addItem( topLabel1 );
The call to addItem() above sets the parent item of topLabel1 to
topBar and thus the latter will display it as one of its children. In
this case it would also set the parent, because the topLabel1 does not
have one yet. In other words, setting a parent item will also set the
parent if the parent is null.
So since the topBar is a parent item of topLabel1, it means that
topLabel1 will inherit settings like visibility and opacity from
topBar. For instance, if we set the the visibility of the topBar to
false, all its child items will be invisible as well (which in this case
would be all top bar labels). If we set the opacity to 0.2, all its
child items will be almost transparent:
topBar->setOpacity( 0.2 );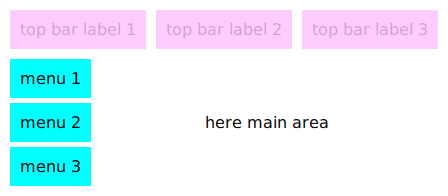
Difference in object trees and item trees
As an example for when the object tree and item tree differ, let’s
decide to add a bottom bar to our UI and move our topLabel1 from the
top bar to the bottom bar. This is easy:
auto* bottomBar = new QskLinearBox( Qt::Horizontal, outerBox );
topLabel1->setParentItem( bottomBar );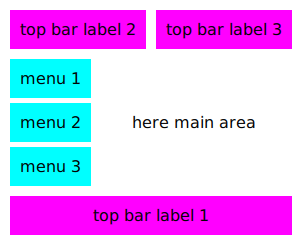
Now we decide to get rid of our top bar altogether:
topBar->deleteLater();This will also delete our label from the bottom bar:
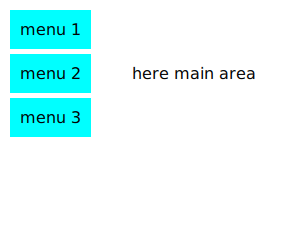
The reason why the label from the bottom bar was also deleted is that
with the call to setParentItem() above we set a new parent item; the
parent, however, was still topBar (the call to setParentItem() did
not change the parent, because it was not null). So when the topBar
was deleted, it deleted all of its children, including the moved label
topLabel1.
After we moved the label to the bottom bar, the object tree was different from the item tree, hence we got a surprising result when deleting the top bar. It is a good idea to try to keep the trees the same, and be aware of the existence of both of them.
If we reparent our label to the bottom bar before deleting the top bar, we get the desired effect:
topLabel1->setParent( bottomBar );
topLabel1->setParentItem( bottomBar );
topBar->deleteLater();